Probably should have some record of my e36 323i track build, so rather than have the build on a multitude of different forums it's just going to be lumped here. Makes more sense given it's not really a show type car.
Anyways...
Long story short, I've wanted to start track days for a while, but didn't fancy doing so in my Z4. Searched high and low for a cheap car to use instead and ended up with an 323i at a bargain price.
Oh, and it's in avus blue. (Pretty much saw the colour and wanted it from then on)
Arranged to see the car January 18th. Everything checked out with it, just didn't have any mot or tax, not a big problem given that the car wouldn't be used for the time being anyway.
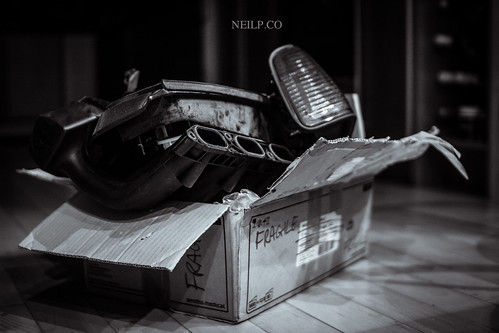
Walked away leaving a deposit and a manifold, throttle body, and tinted rear lights in hand, and a lot of paperwork.
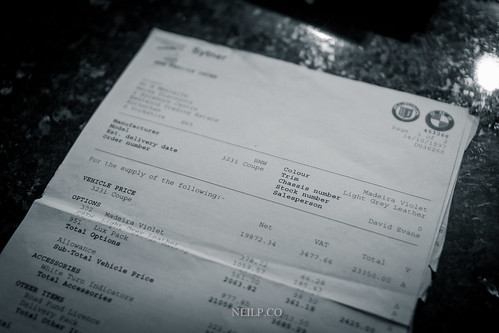
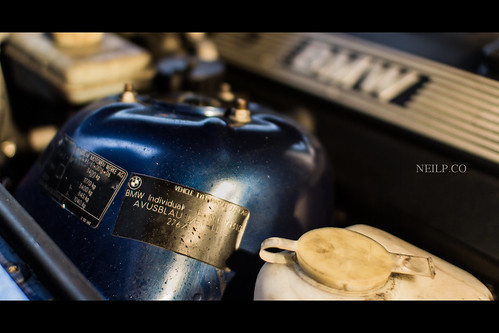
Started to look through the paperwork and even found the original receipt for the car from the first owner. Pretty nice touch there. The colour I can only assume was changed given that this was the initial order from Sytner BMW.
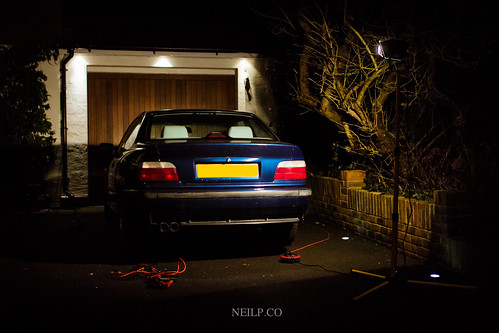
Managed to get her home and swapped out the battery immediately. Yeah it was cold and took forever as a result, but it had to happen then. Definitely as a result of the previous owner having declared the car off the road and not having had a conditioner on the battery.
Got the battery in and saw the voltage resting at 7v. Dead. Shot in the dark, hooked up the beaten battery up to a CTEK charger, set it to recondition mode and left it overnight. Woke up to a battery with a healthy floating voltage.
Unfortunately both batteries are a little on the heavy side and are flooded cells. Currently that will suffice but I'm on the hunt for a light dry cell battery which should be more than enough considering the car will be stripped of a stereo and all the unnecessary electronics (not that there were many to begin with on this car in all honesty!)
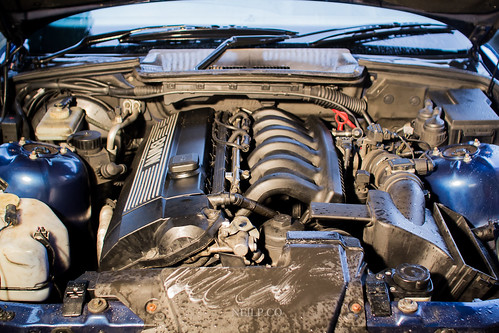
And then woke up the next morning bright and early ready to work on the car. Started with the engine. Degreasing it and finding any broken/missing screws/clips.
Will be making a list of all the service parts needed, will be putting in new filters, fluids and plugs. In addition to that, the brakes also need new discs and pads so that will be taken care of. Ideally I would like to run bigger brakes but for the time being while I'm still learning about the car, they should suffice. (Main reason I won't be doing the manifold upgrade for a while as I want to ensure the car runs smoothly first before doing any actual tinkering around.)
Before that could begin though, had to stop and admire this wonderful sight. Some options BMW Individual have gotten horribly wrong, but this colour is certainly one of those they had got right!
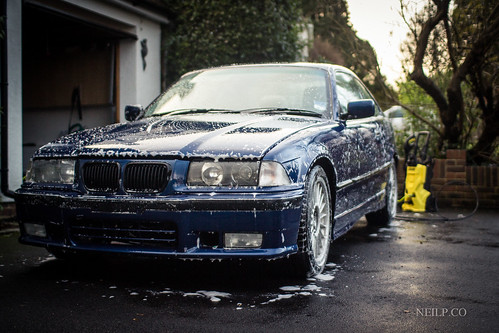
So she got a wash...and nothing else. Half debating if it's worth even claying, waxing and polishing, but knowing me, some of my best products will probably used to make her look good.
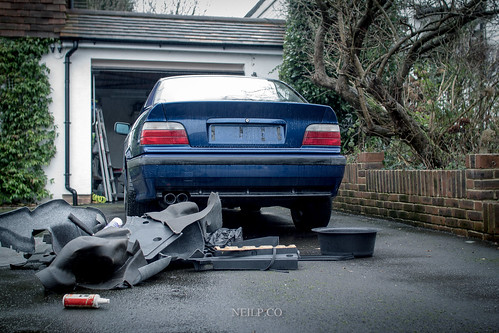
Lost some weight. All the panels in the boot had to go, insulation and all. Spare tyre was out too as well as the rear seats and quarter panels with no intention of going back in. Weight saving is the motto. Though that rear could use a big wing on the back!
and then set about getting busy with the interior...
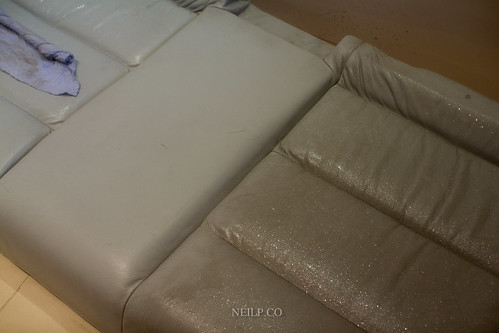
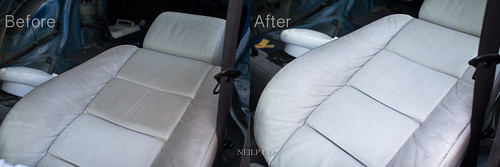
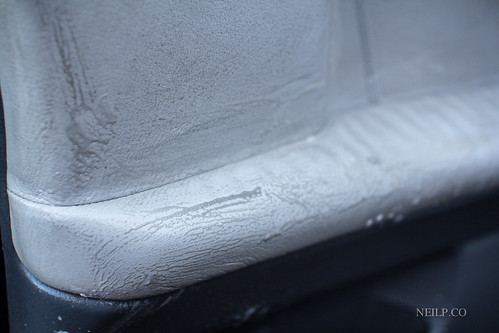
Essentially the interior was in pretty awesome condition, the only issue being that it was filthy! Got to work with some Meguiar's APC and a brush with a damp rag. With relatively little effort, they looked and felt practically brand new! Hopefully selling the full interior should pay for a new pair of bucket seats and harnesses! Given the car doesn't need to be driven, I'd happily sell the interior and wait around for a good deal on a new interior!